Storage Projects with a Clear Purpose
Most builder-grade cabinets and closets waste half their cubic volume because shelves are spaced 16 to 20 inches apart and deep drawers lack internal walls. Instead of buying brittle acrylic bins that slide around and crack, these four weekend projects use honest wood, cork, and steel hardware to divide space permanently or reversibly.
Friction-Fit Birch & Cork Drawer Grid
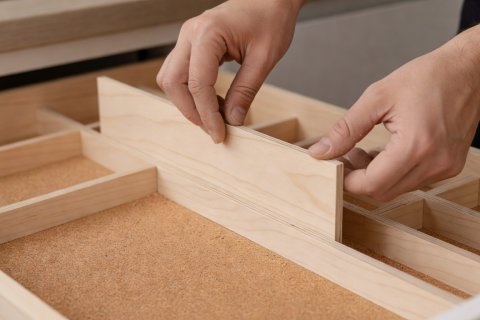
Standard plastic cutlery trays rarely match the exact interior width of your cabinet drawer, leaving a 3-inch dead gap where skewers and rubber bands collect. By cutting 1/2-inch Baltic birch plywood strips to the exact inside length of your drawer, you create a snug, custom grid without driving a single screw into your heirloom or rental cabinetry.
Required Materials & Tools
Materials: 3-inch tall strips of 1/2-inch (12mm) Baltic birch or poplar Hobby Board; 3mm adhesive-backed cork roll; 220-grit sandpaper; food-safe mineral oil.
Tools: Steel tape measure, combination square, fine-tooth pull saw (such as a Vaughan Bear Saw), utility knife.
- Line the Drawer Floor First: Empty and vacuum the drawer. Measure the interior floor and cut a sheet of 3mm cork liner to fit snugly. The cork silences rattling utensils and grips the bottom edges of your wooden dividers.
- Cut Full-Depth Longitudinals: Measure the front-to-back interior depth at both the left and right sides. Cut two 3-inch tall birch strips 1/32 inch longer than the measurement so they press-fit gently against the drawer front and back.
- Add Cross Dividers for Short Tools: Arrange your actual spatulas, peelers, and measuring spoons inside the bays. Mark where cross-stops are needed and attach them using a dab of Titebond wood glue or double-sided woodworking tape.
- Sand & Oil: Ease the top edges with 220-grit sandpaper and wipe with mineral oil before returning utensils.
Freestanding Pine Shelf Doublers
When folded bath towels or stoneware bowls are stacked more than four high, pulling from the bottom collapses the pile. Building simple U-shaped freestanding risers out of 1×10 select pine boards instantly splits a tall shelf into two sturdy tiers—and lifts right out when you move house.
Select Pine 1×10 (Actual: 3/4" × 9-1/4")
Top Decks: 2 pieces @ 24 inches long.
Side Legs: 4 pieces @ 7-1/2 inches tall.
Back Cleat (Anti-Racking): 2 pieces of 1×2 pine @ 22-1/2 inches long.
Fastening for Zero Sag
Pre-drill three countersunk pilot holes through each end of the top deck into the 7-1/2 inch side legs using 1-5/8 inch #8 wood screws and wood glue. Screw the 1×2 cleat horizontally across the upper back of the legs so the riser cannot sway sideways under heavy cast-iron or ceramic loads.
Stud-Mounted Shaker Peg Rail
Inspired by 19th-century Hancock Shaker Village workshops, a continuous wooden peg rail keeps brooms, canvas market bags, step stools, and wool coats off the floor while allowing air to circulate around damp fabrics.
- Locate Wall Studs Accurately: Use a magnetic stud finder (such as a StudBuddy) to locate the drywall screws along your target wall at 64 inches above the finished floor. Mark stud centers with painter’s tape (typically 16 inches on center).
- Prepare the Backboard: Cut a 1×4 clear maple or poplar board to span at least two wall studs (36 inches is ideal for a narrow utility closet). Drill 5/8-inch peg holes spaced every 6 inches along the horizontal centerline, stopping 1/8 inch short of piercing the back.
- Glue the Shaker Pegs: Apply wood glue to the tenons of 3-1/2 inch birch Shaker pegs and tap them home with a rubber mallet, keeping them square.
- Drive Structural Screws Into Studs: Hold a spirit level along the top edge of the rail and drive two 3-inch #10 cabinet screws directly through the backboard into each wall stud. Cover screw heads with flush wood plugs or leave brass countersunk washers visible.